Sending Mass Communications
Sending mass communications in Current is accomplished in three steps:
Create the Template
The template defines what we're sending. To create one, follow these steps:
-
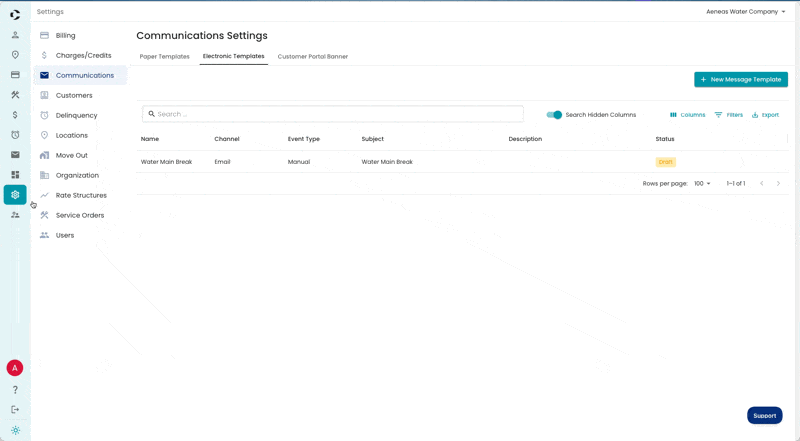
Navigate to the Settings > Communications (direct link), then click Electronic Templates and New Message Template.
- Fill out the fields in the Communication Template drawer:
- Name: An internal name to identify the template.
- Channel: The communication channel you'll use to send this template. Can be one of Email, SMS (text message), or Voice.
- Event Type: The event that should trigger sending of this template. In most cases, this should be Manual. There are also automatic triggers available for Bill Past Due and Leak Detected.
- Status: Controls whether this template can be sent to your customers. Keep this set to Draft until ready to send, then set it to Active.
- Description: An optional internal field if you need more detail than is captured by Name.
- Subject: The subject line that will be sent with the template (Email templates only).
-
Enter your message in the Content field. Type "/" to personalize the message with account-specific variables like name or account ID.
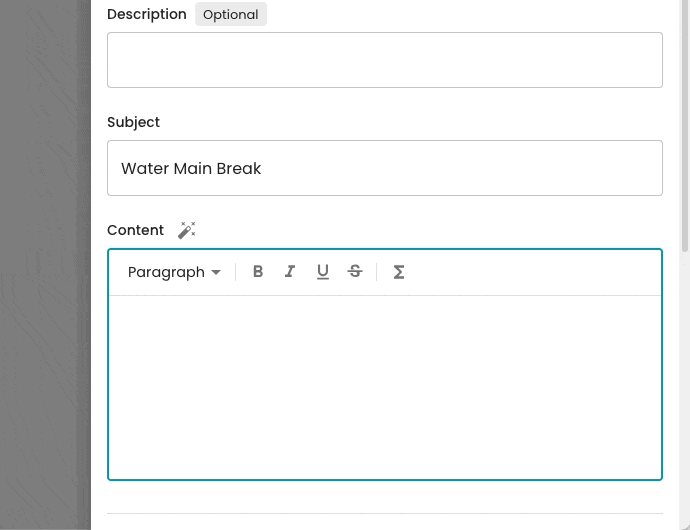
- Alternatively, draft your message with AI! Fill out the Subject field and click the magic wand icon to generate a draft. Email templates only.
- When you're done editing, click Save.


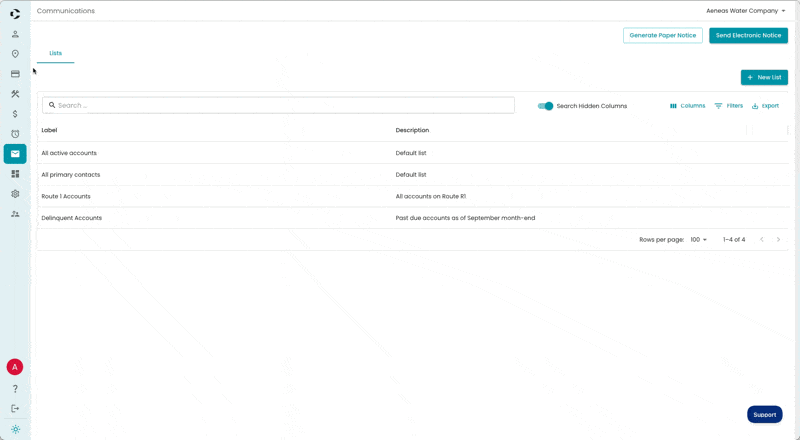
Create the Recipient List
Now that we've defined what we're sending, we need to define who we're sending it to. We do this by creating a Recipient List.
-
Navigate to the top-level Communications section (direct link). Note this is different than the Settings > Communications section where we just created the template. Click New List.
- Decide whether you want to create a static or dynamic recipient list. A Static List is a fixed list of accounts that never changes, e.g. "account IDs 1-1-8-1, 1-1-0-1, and 1-2-13-1". A Dynamic List is defined by a set of filters, and the accounts included change based on whether they satisfy the criteria at send time, e.g. "all acounts on Route 1". Click either Static List or Dynamic List.

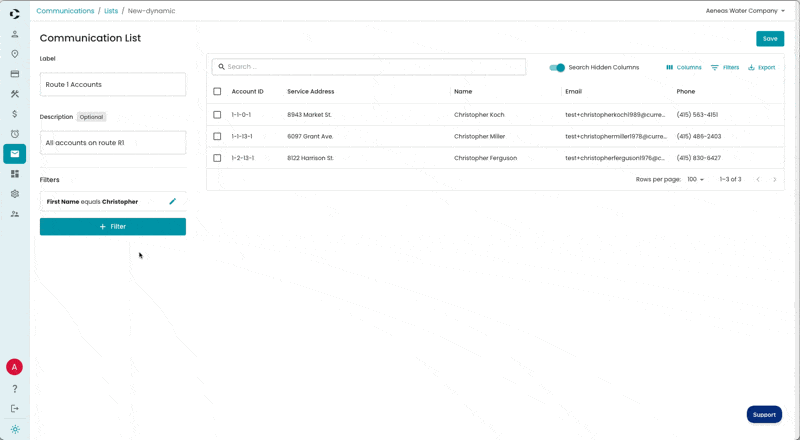
Create a Static Recipient List
A Static Recipient List is a fixed list of accounts that never changes (e.g. "account IDs 1-1-8-1, 1-1-0-1, and 1-2-13-1"). To create one, follow these steps:
- Fill out the informational fields at the top of the Communication List:
- Label: An internal name to identify the recipient list.
- Description: An optional internal field if you need more detail than is captured by Label.
- Add contacts to the list. There are two ways to create a static recipient list. The first is to add contacts manually one-by-one. The second is to import contacts from a file.
Add Contacts Manually
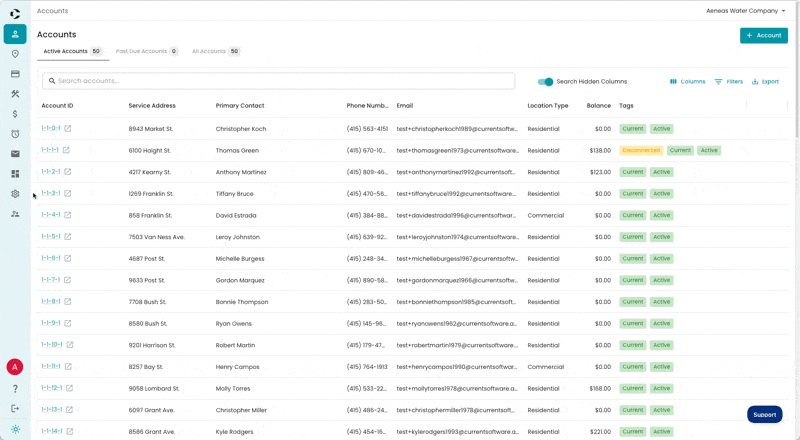
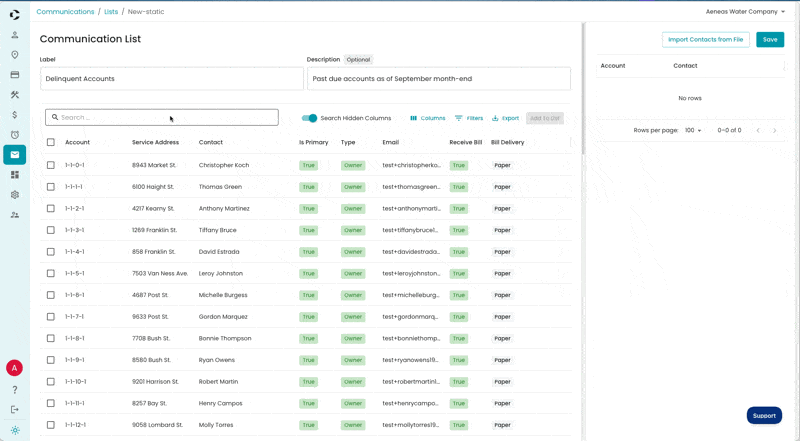
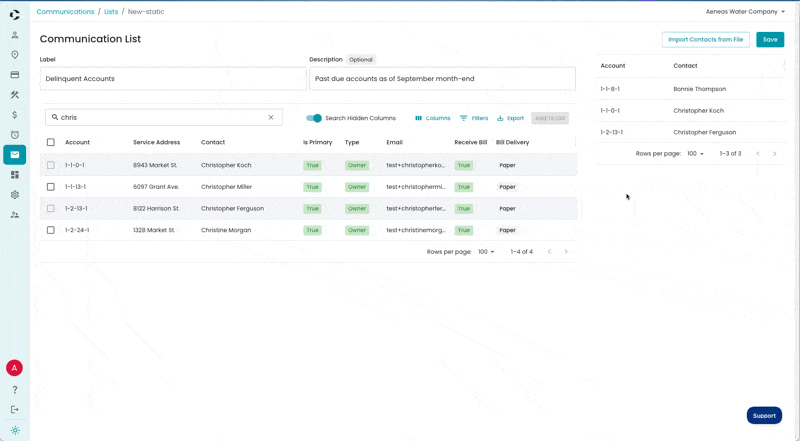
You can add contacts to a static list by selecting them from a list, one-by-one.
-
Search for the account you want to add, click its checkbox, then click Add To List.
-
To remove an account from the list, hover over it and click the trash icon.
- If you're happy with your list, click Save and skip ahead to Send the Template to the Recipient List. Keep reading if you want to learn how to import contacts from a file instead of adding them one by one.


Import Contacts from File
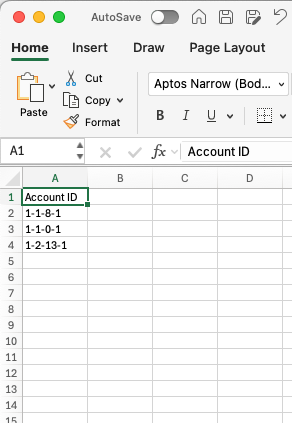
You can add contacts to a static list by importing them from a CSV file.
-
Obtain or generate a CSV file with a column that contains the account IDs you want to add. The import accepts several variations of "Account ID" as the header for this column. Other columns in the file will be ignored.
-
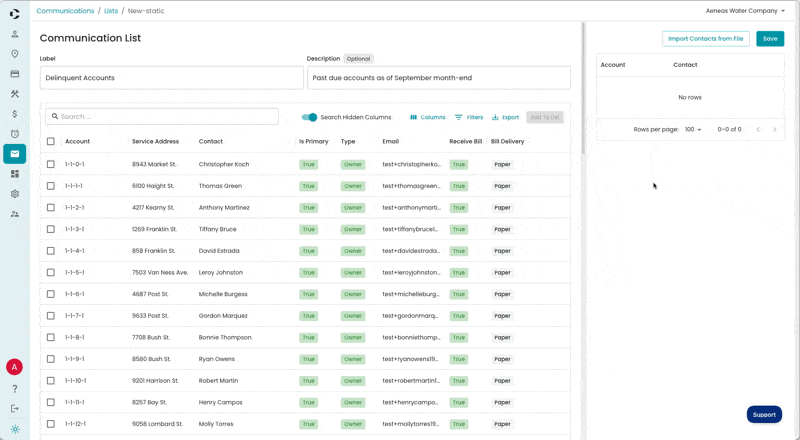
Click Import Contacts from File, then Browse (or drag and drop the file), then Import.
- When you're done editing, click Save and skip ahead to Send the Template to the Recipient List. The next section is about creating a Dynamic List, and it's not relevant to the Static List we've just created.


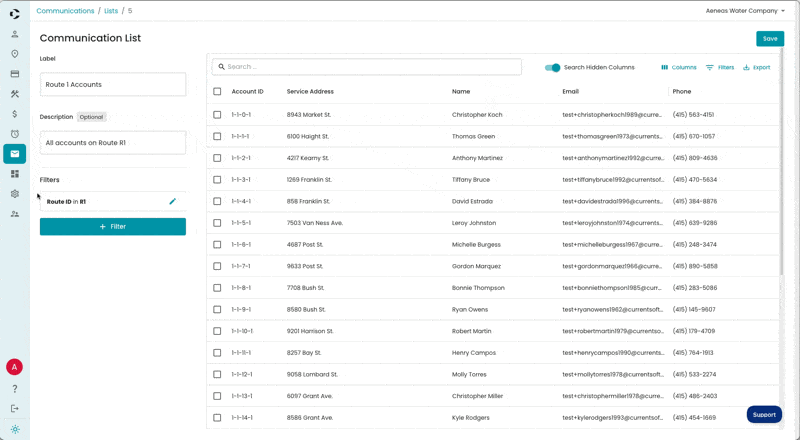
Create a Dynamic Recipient List
A Dynamic Recipient List is defined by a set of filters, and the accounts included change based on whether they satisfy the criteria at send time (e.g. "all acounts on Route 1").
- Fill out the informational fields at the top of the Communication List:
- Label: An internal name to identify the recipient list.
- Description: An optional internal field if you need more detail than is captured by Label.
-
Add filters to constrain the included accounts. The list will update as you add and remove filters.
- When you're done editing, click Save.

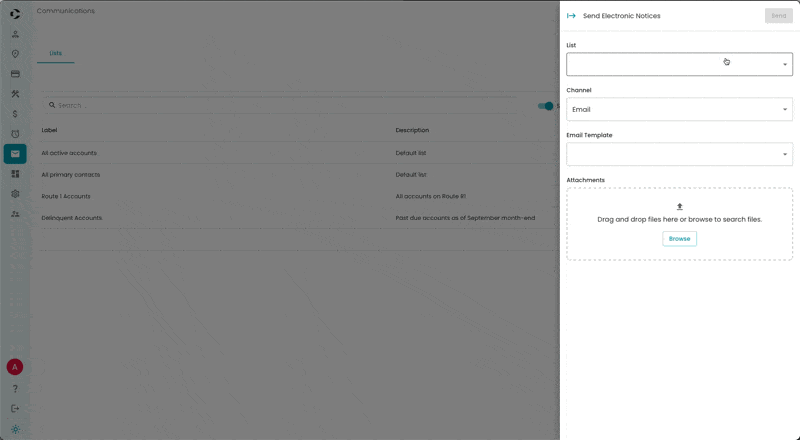
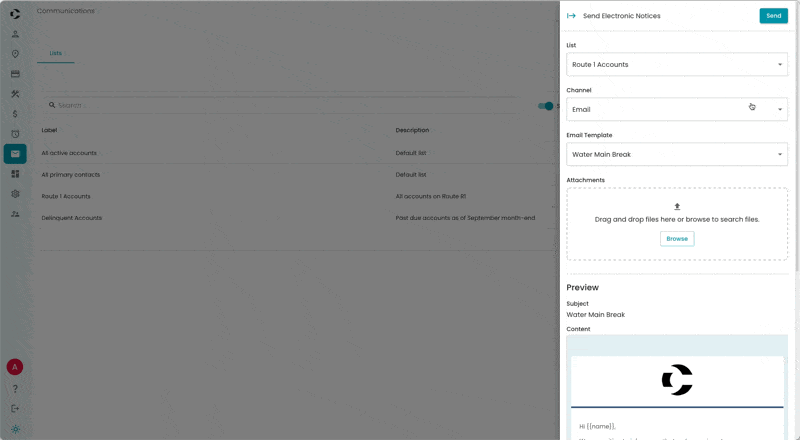
Send the Template to the Recipient List
We've defined what we're sending and who we're sending it to. It's time to send it!
-
Navigate back to the top-level Communications section (direct link), then click Send Electronic Notice.
- Fill out the fields in the Send Electronic Notices drawer:
- List: The Recipient List we created above.
- Channel: The communication channel of the template we created above.
- Template: The template we created above.
- Attachments: Upload any attachments you want to attach to the email (Email templates only).

Note: If you don't see the Template you're looking for in the dropdown, please check the following:
- Make sure the Channel you've selected is correct. For example, SMS templates will not appear when you have Email selected.
- Make sure you didn't leave your template status set to Draft. See Step 2 in Create the Template.
-
You can test the email by sending it to yourself first. Scroll down and enter your email address in the Send Preview To field. Click Send.
-
Review the preview sent to your email. If everything looks good, go to the top right corner of the Send Electronic Notices drawer and click Send. A dialog box will ask you to confirm your decision. Click Send again.
-
You can confirm that your message was sent by going to the Account detail page of an account that was included in your Recipient List. Click the Communications tab, hover over the message you want to view, and click the eye icon.