Create Custom Reports
Overview
Step By Step Guide
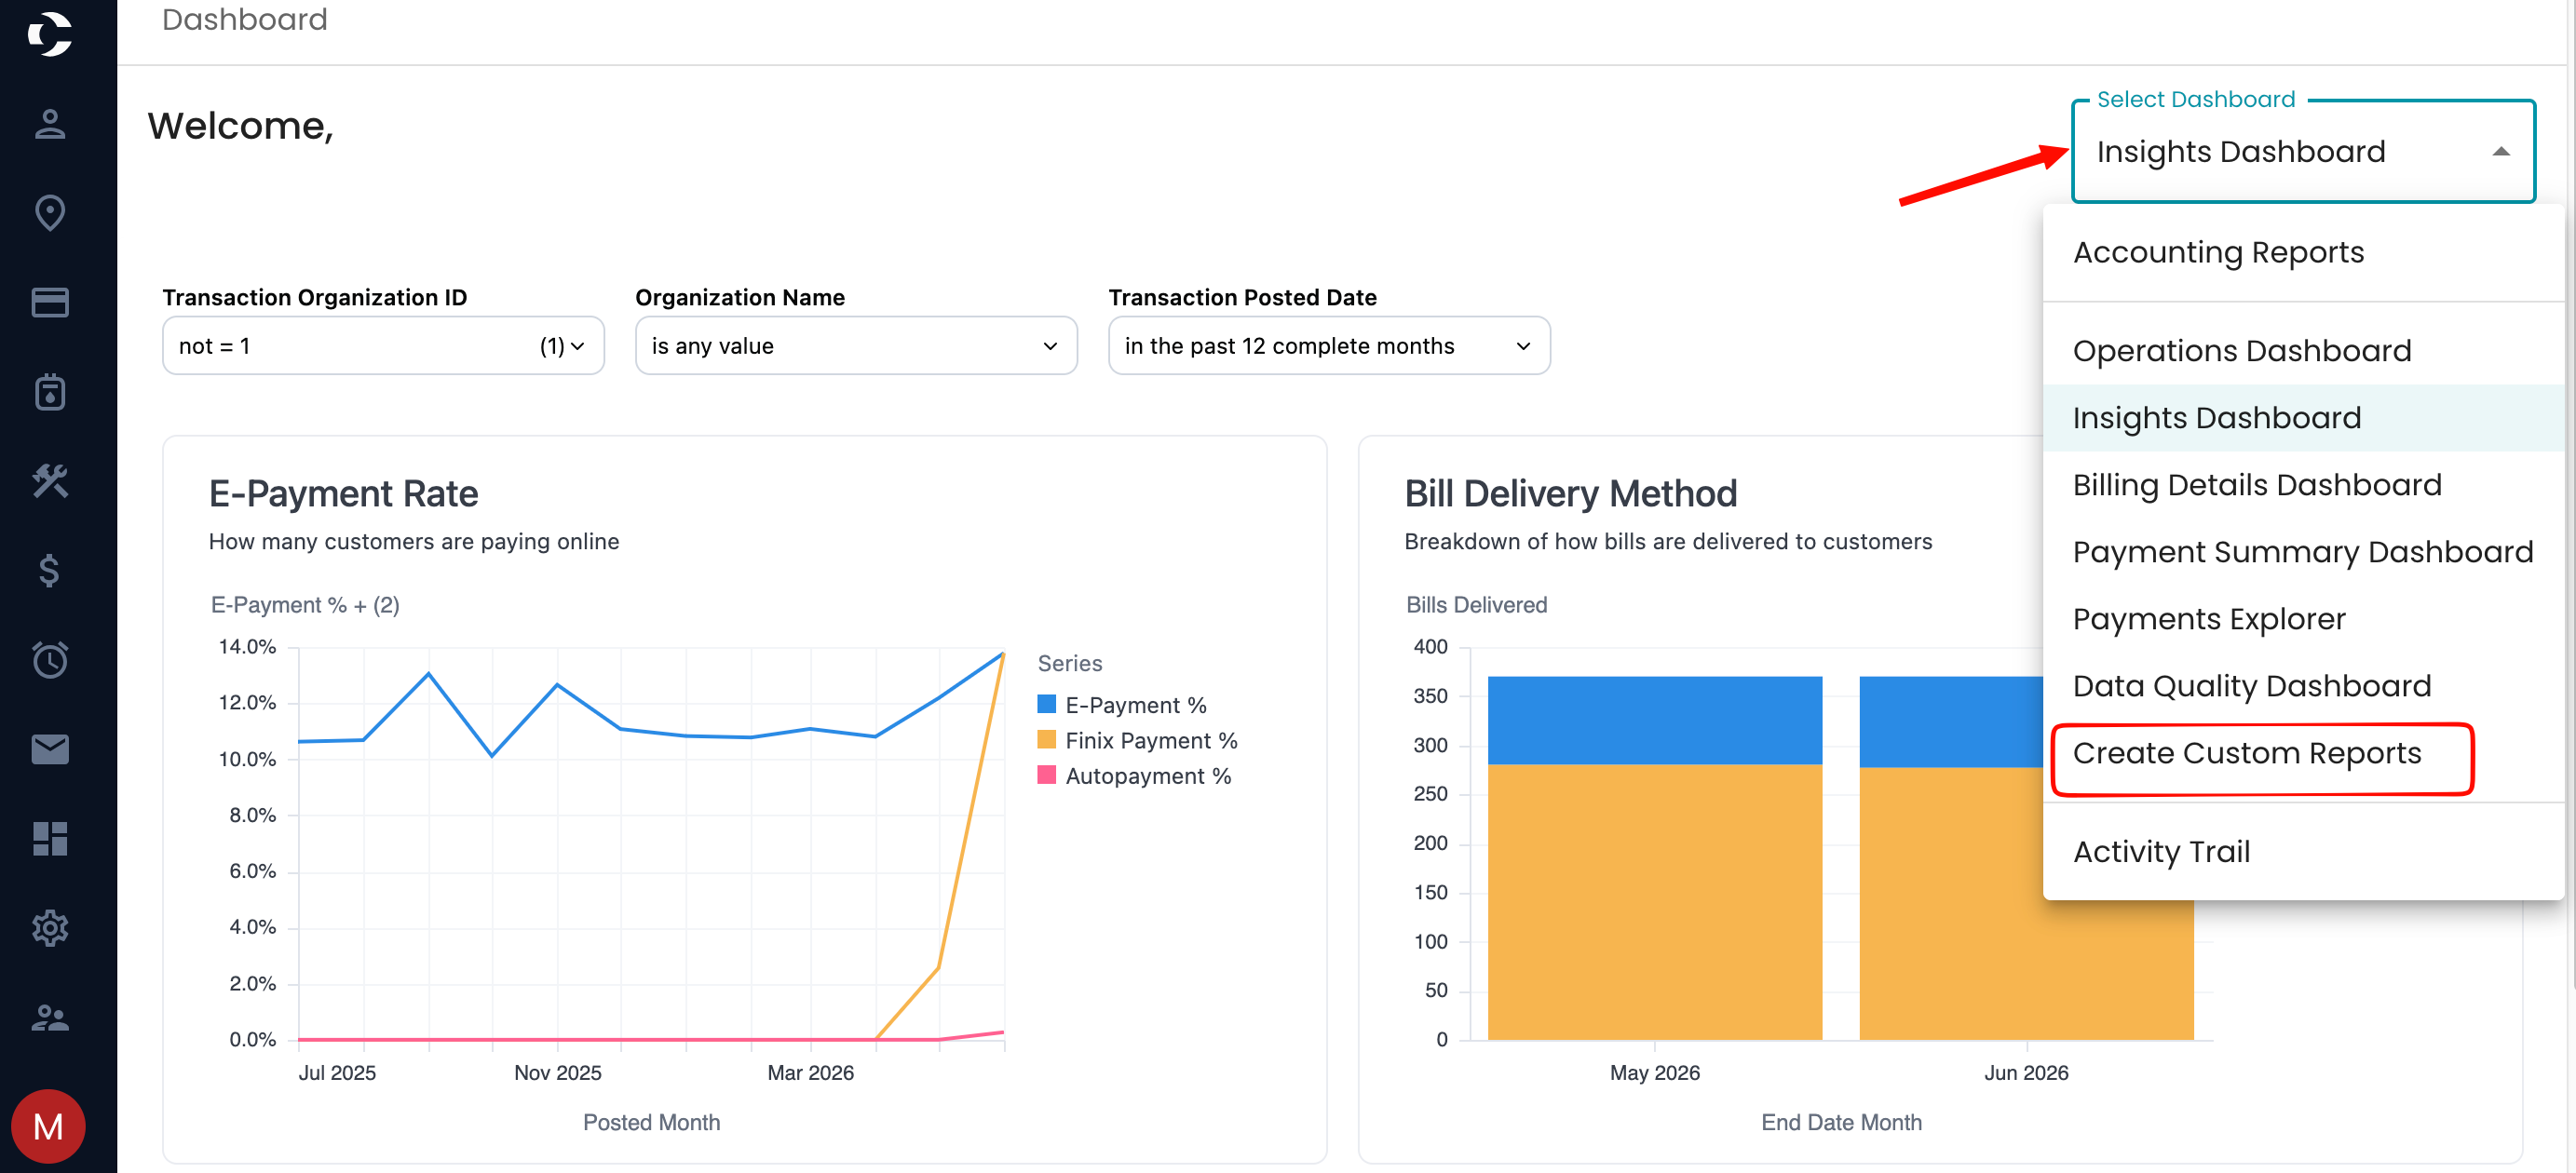
To access the Custom Reports, navigate to the Select dashboard drop-down in the upper-right corner and select Create Custom Reports.
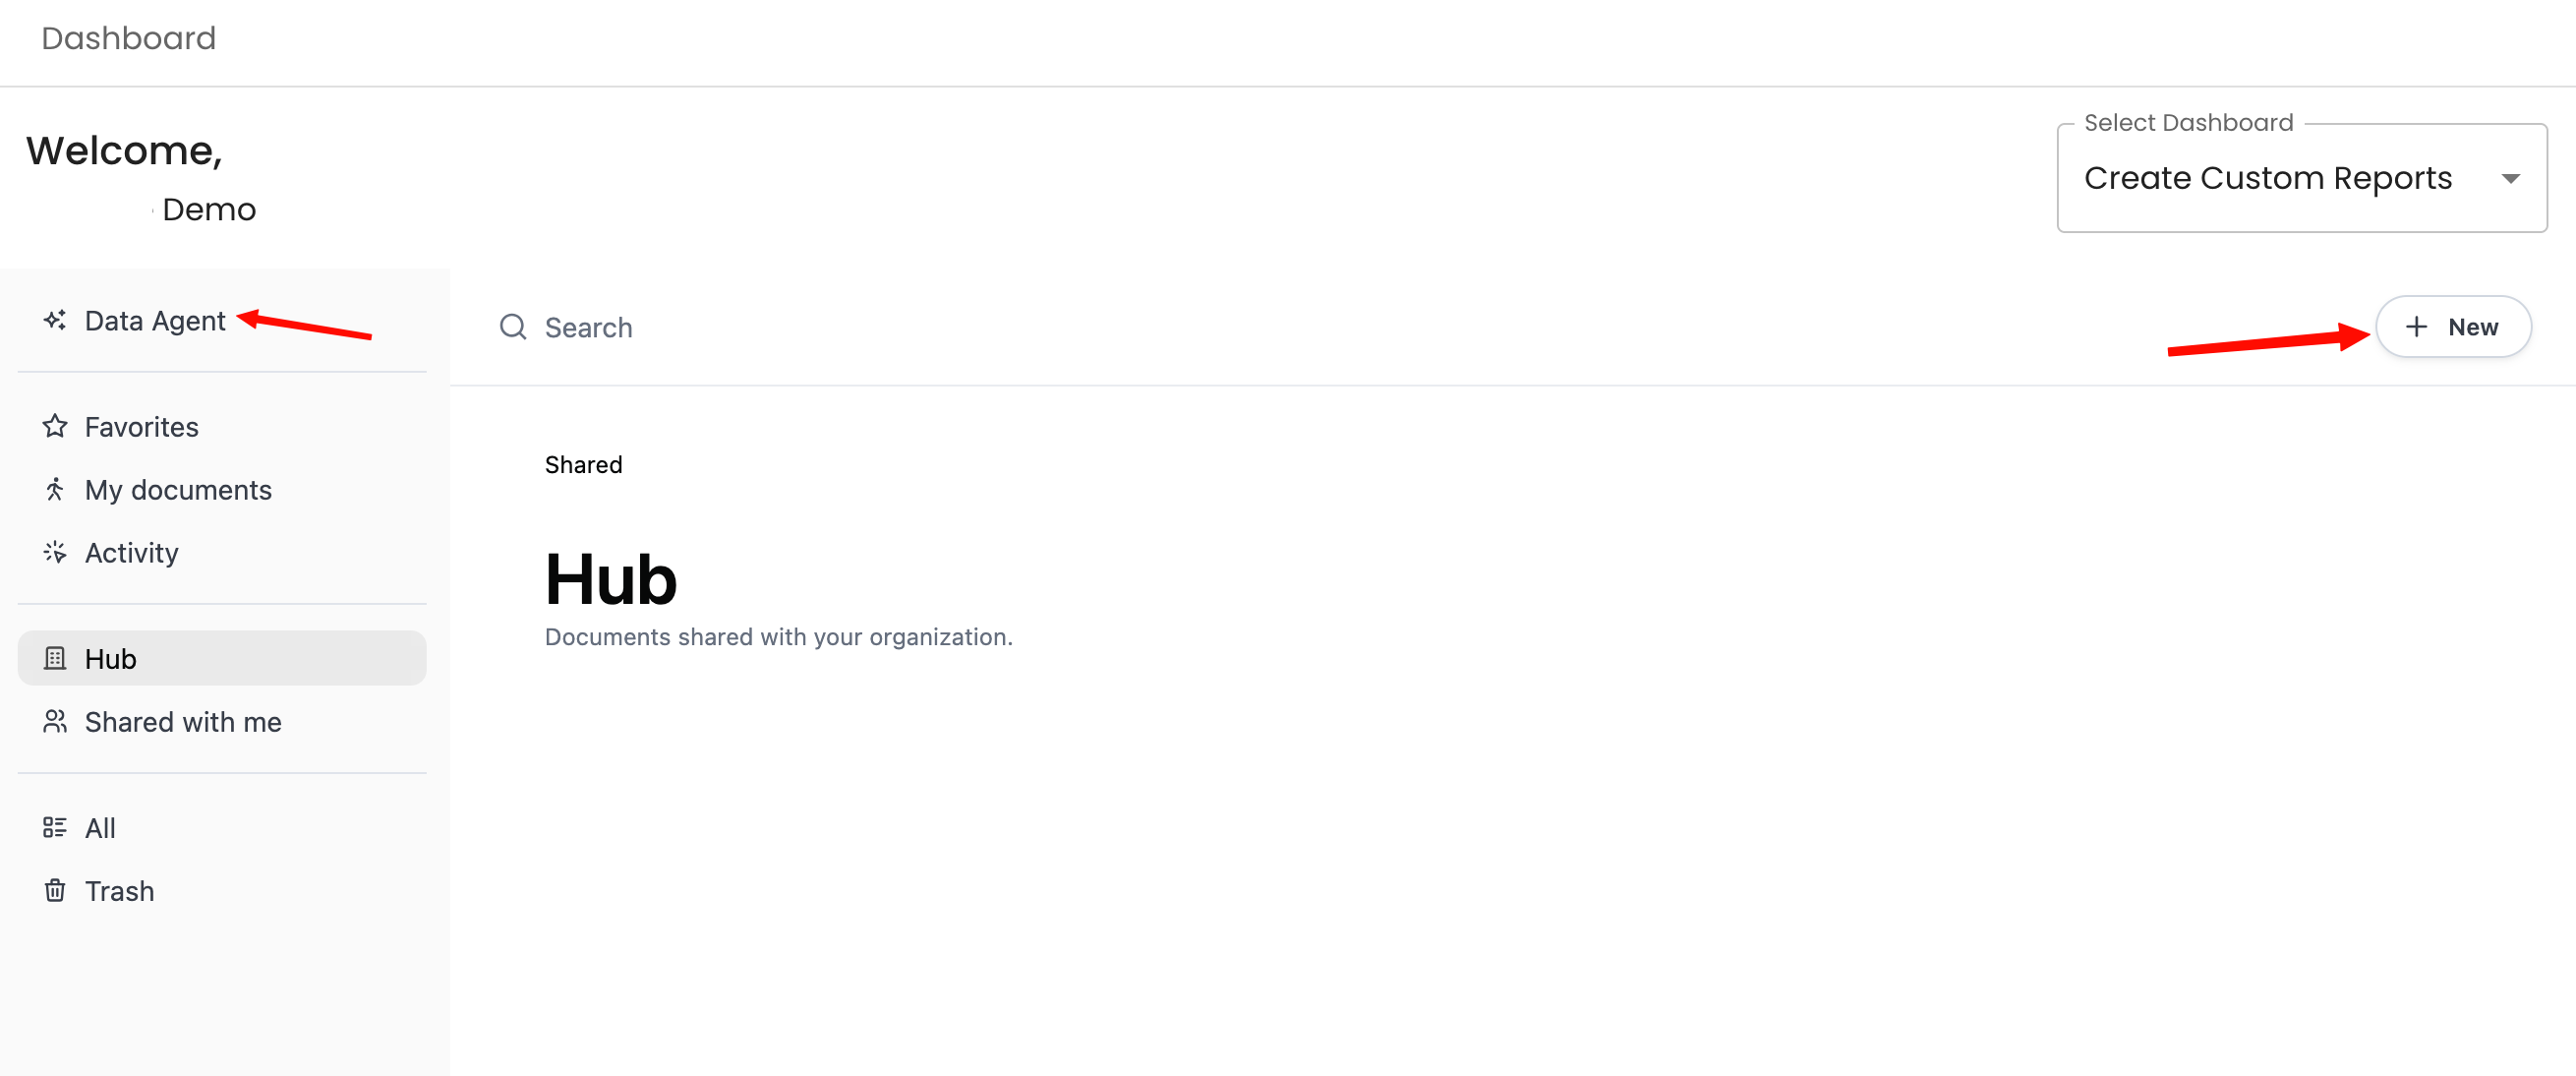
Once in the Custom reports section, select either the +New to create your own report manually or select the Data Agent to prompt the Agent to create a report for you.
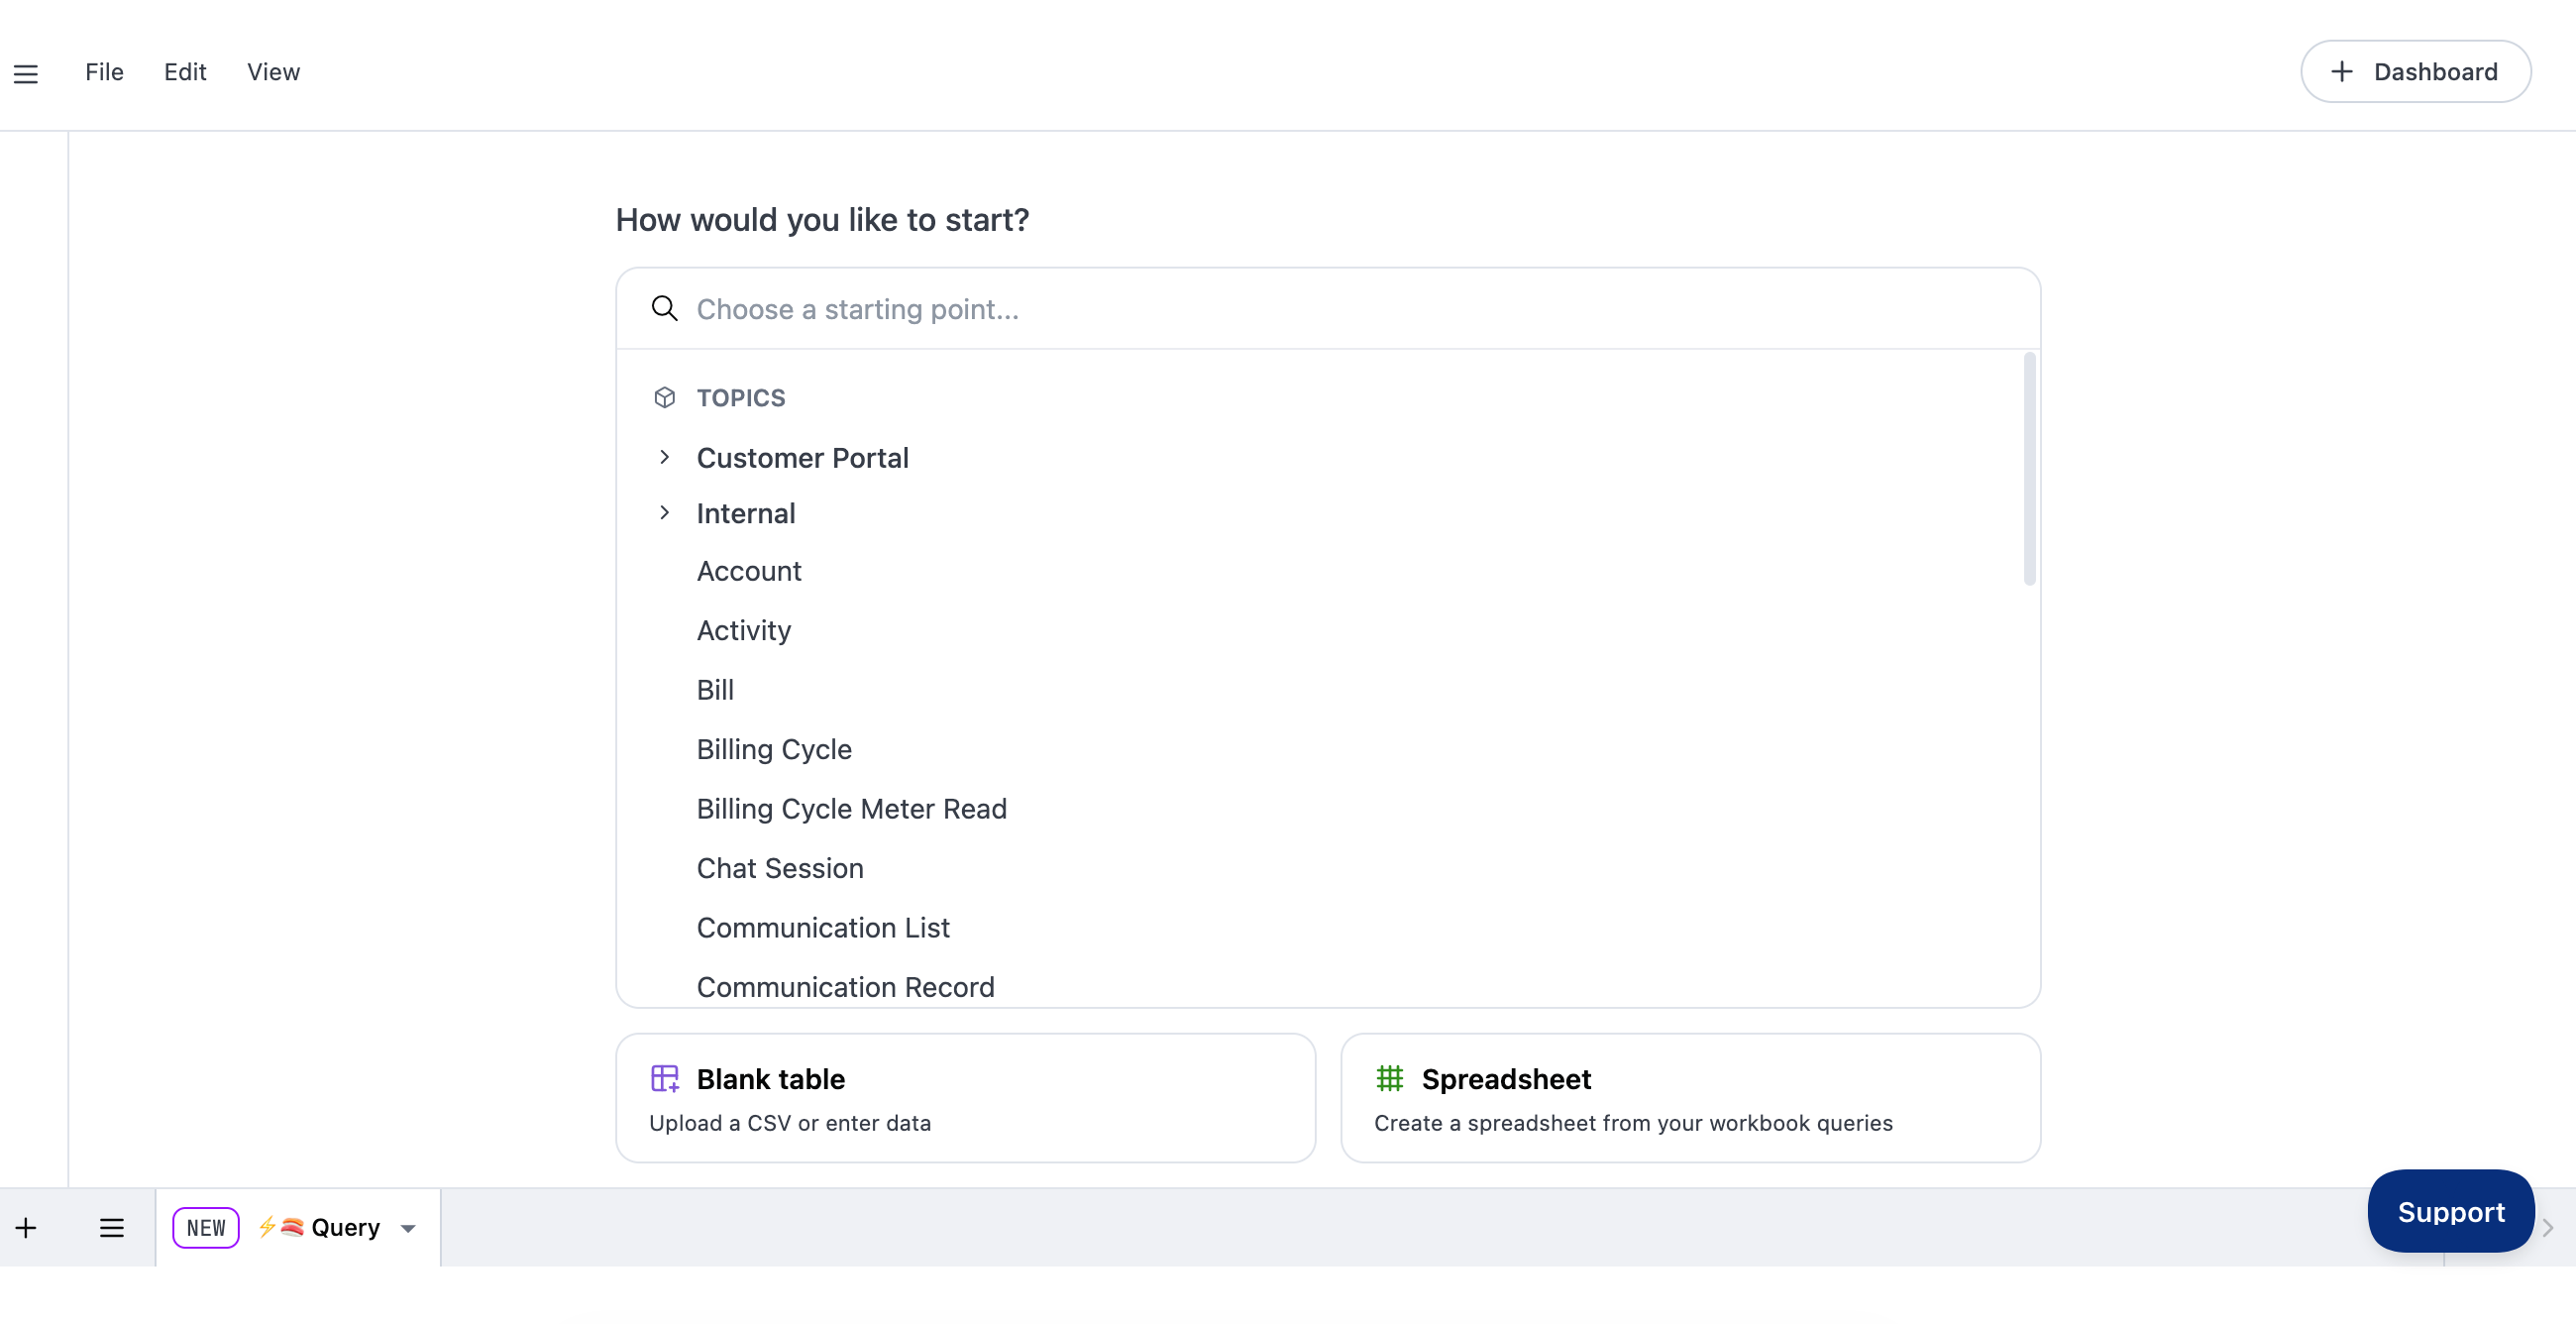
When +New is selected, the report Topics will be available for choosing depending on what you need.
In this instance, the primary account was selected, and the account ID was chosen to start the report. It will pull in all account IDs to begin the report.
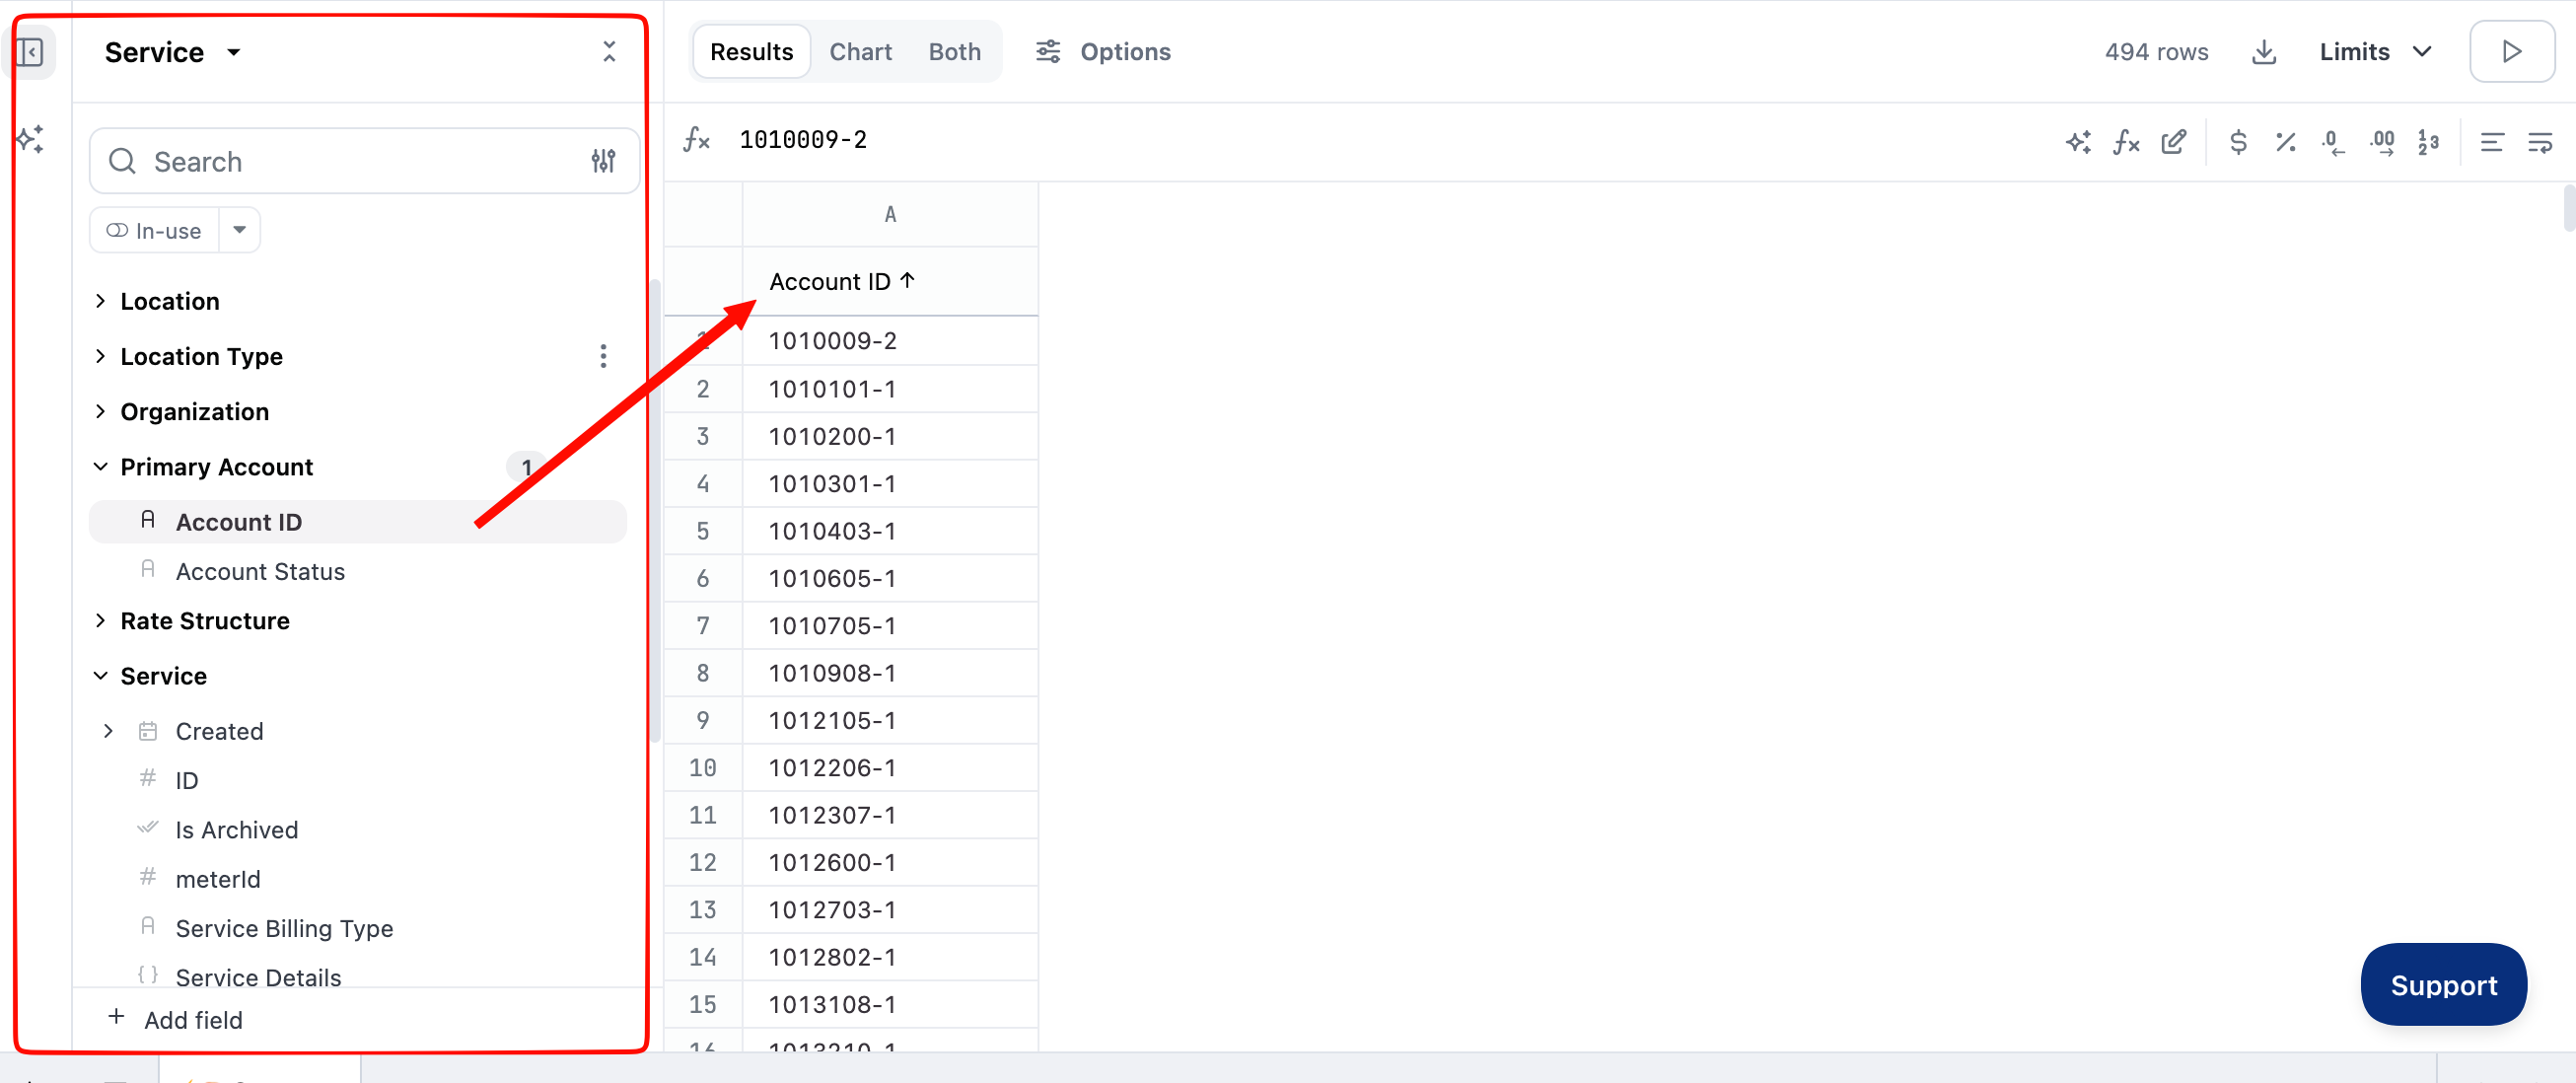
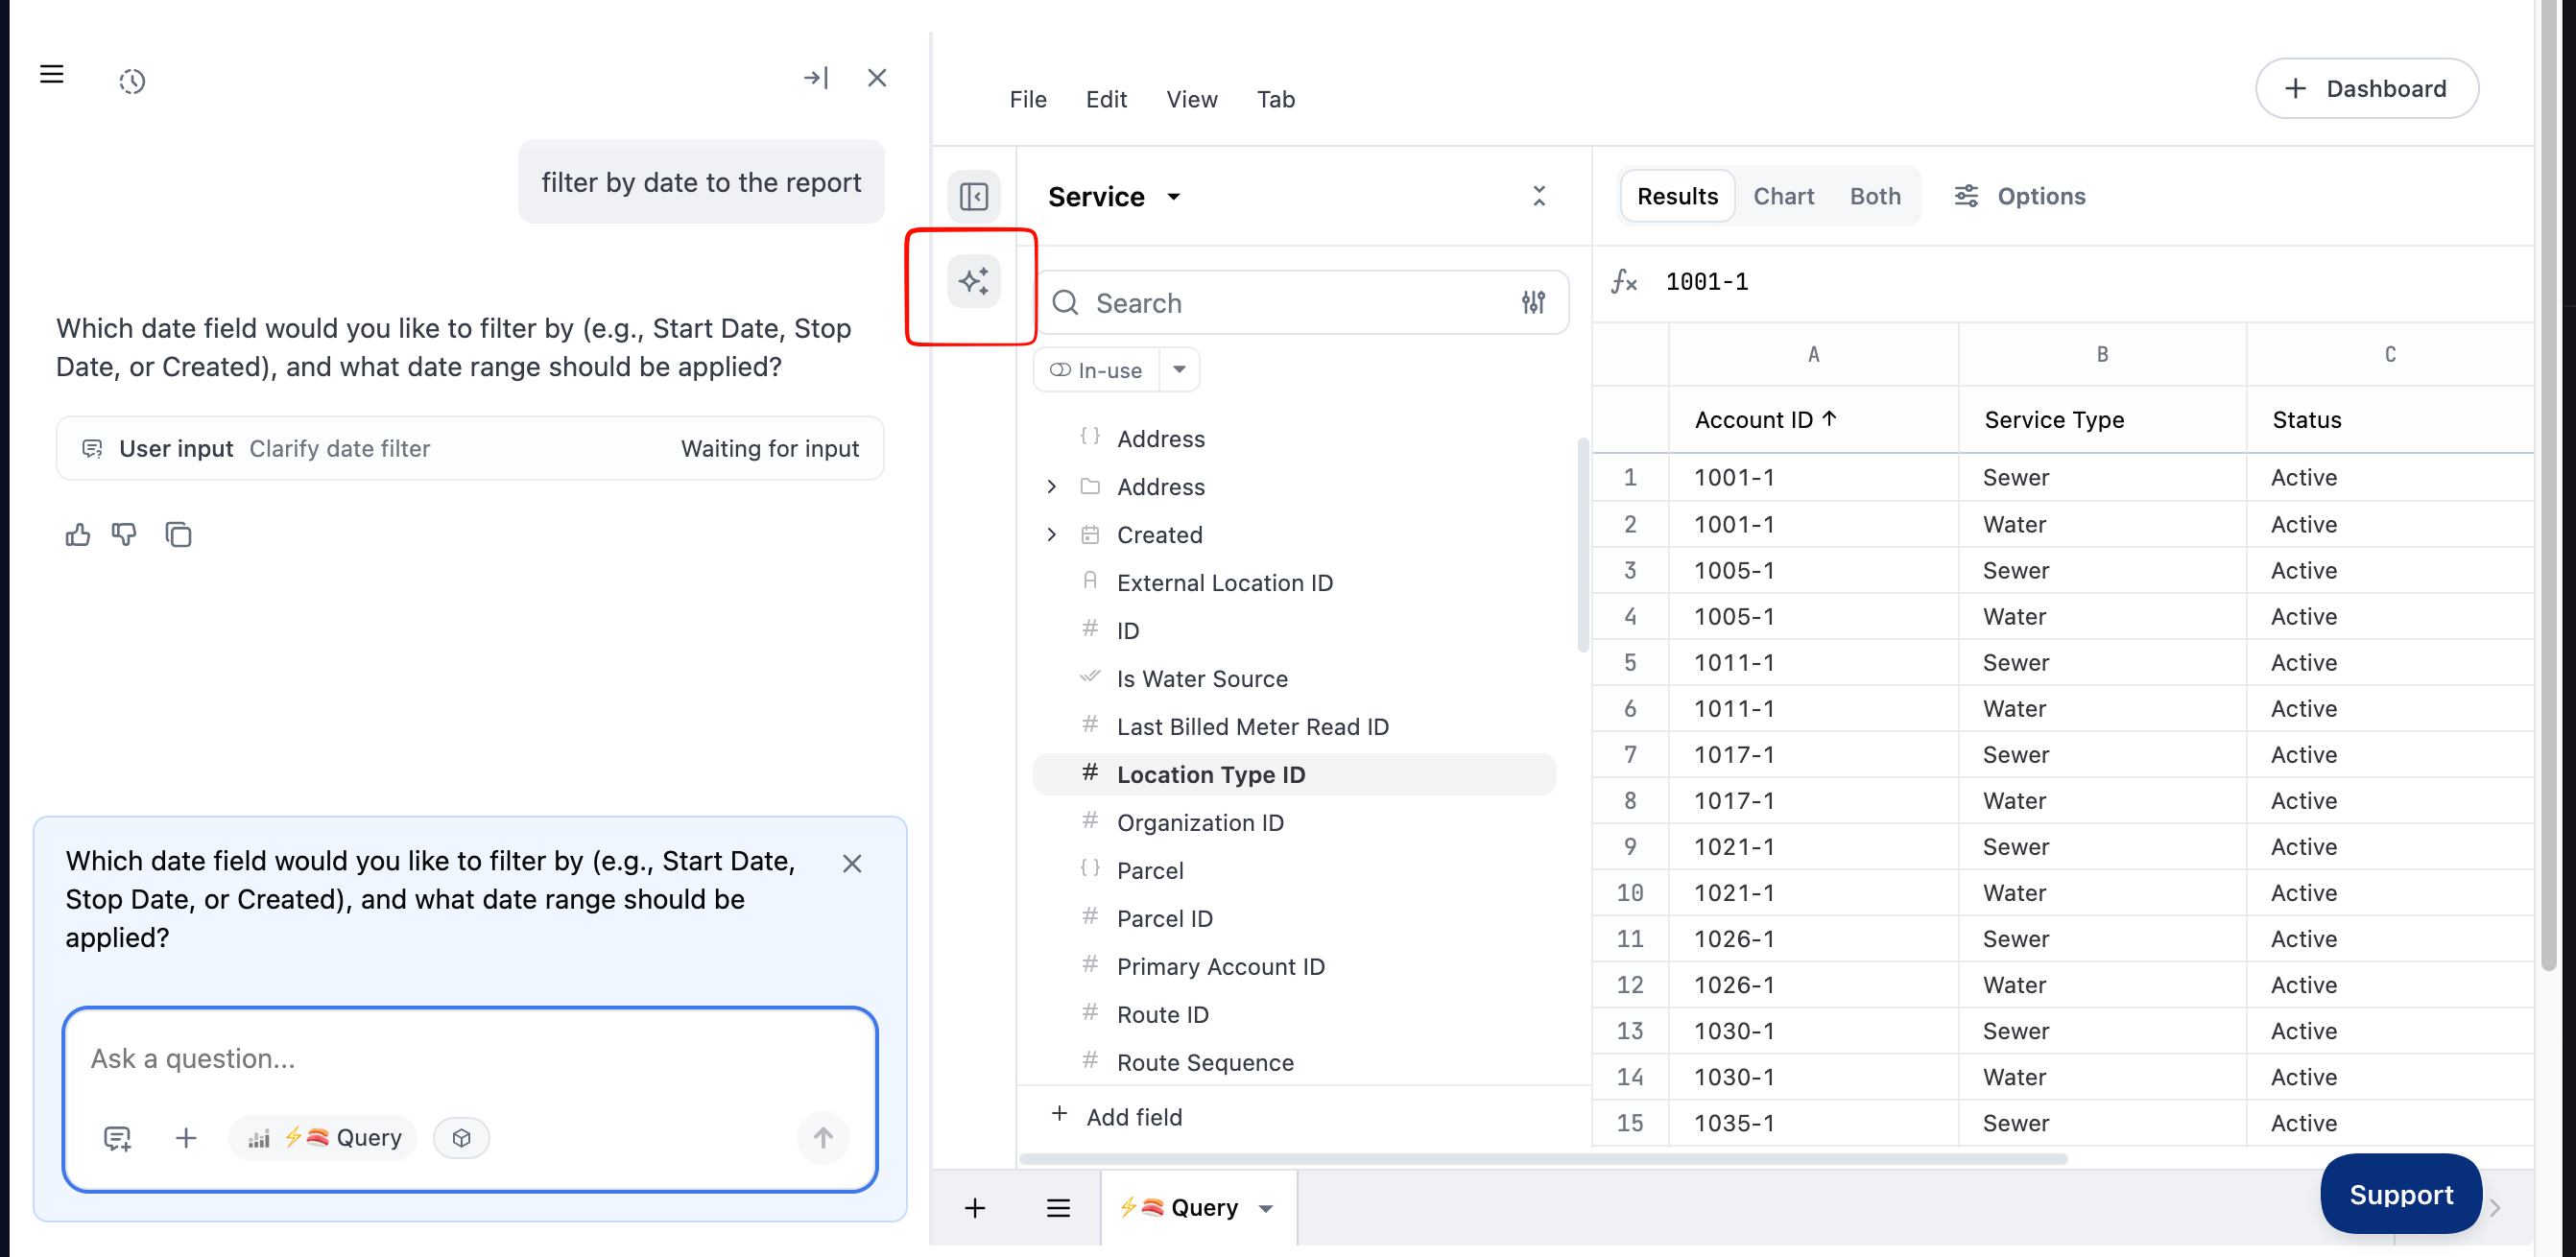
Continue selecting the information you need to populate your report. You can also use the Data agent during this process by selecting the 3-star icons to prompt it if any modifications need to be added, such as a filtered option, or simply to add the items you are looking for.
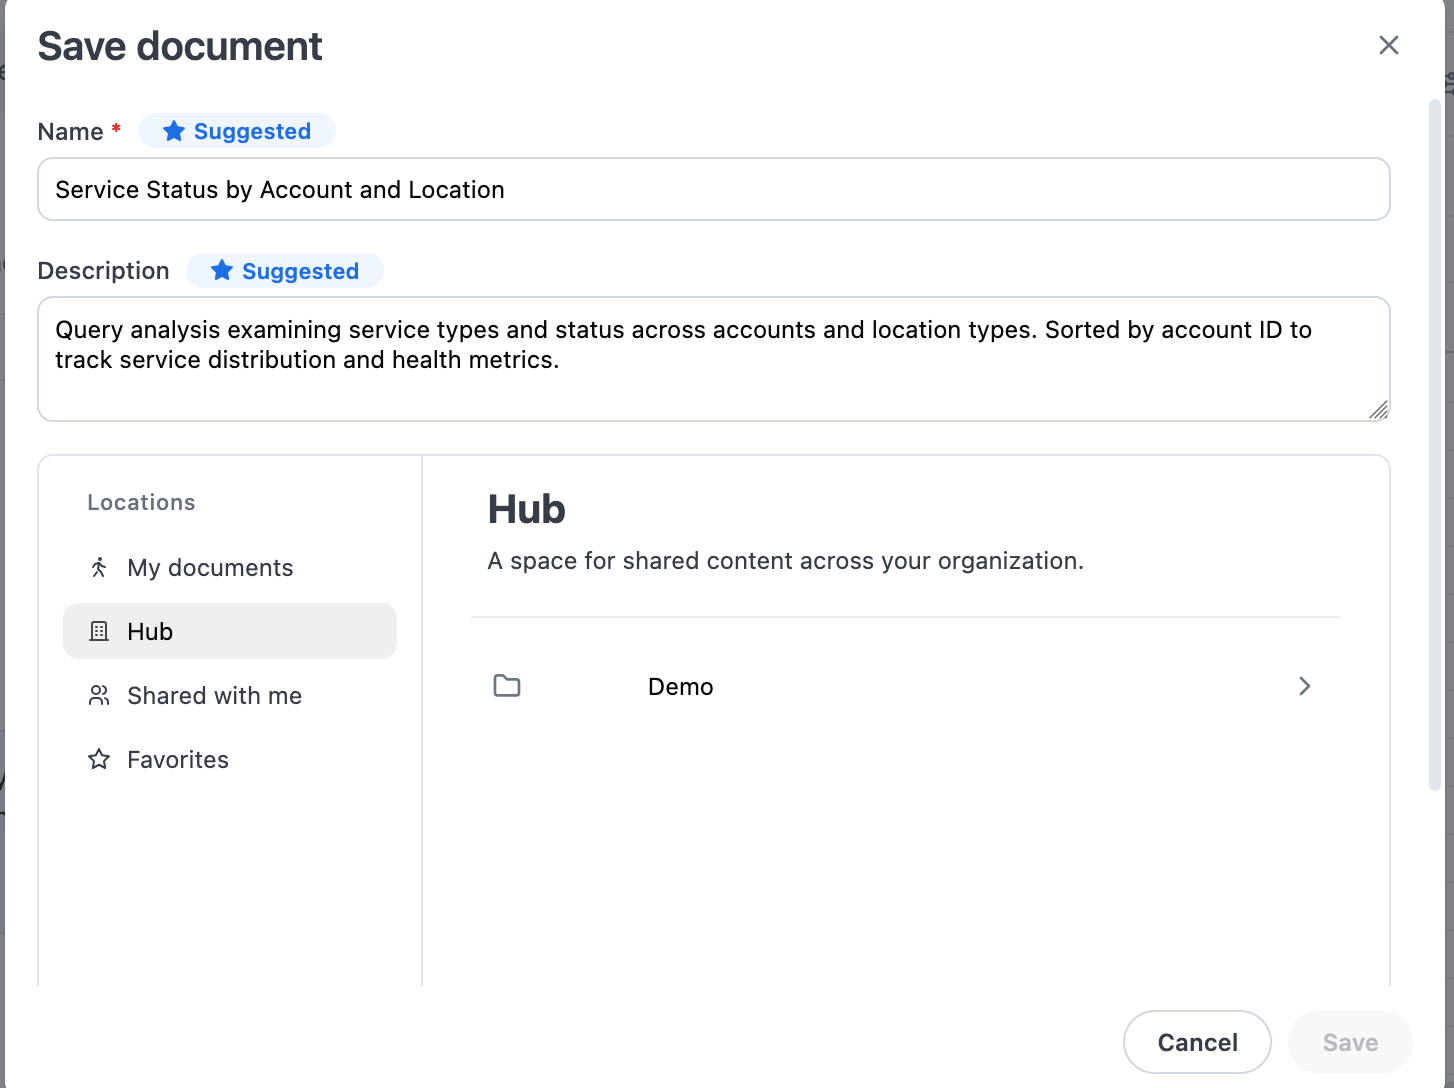
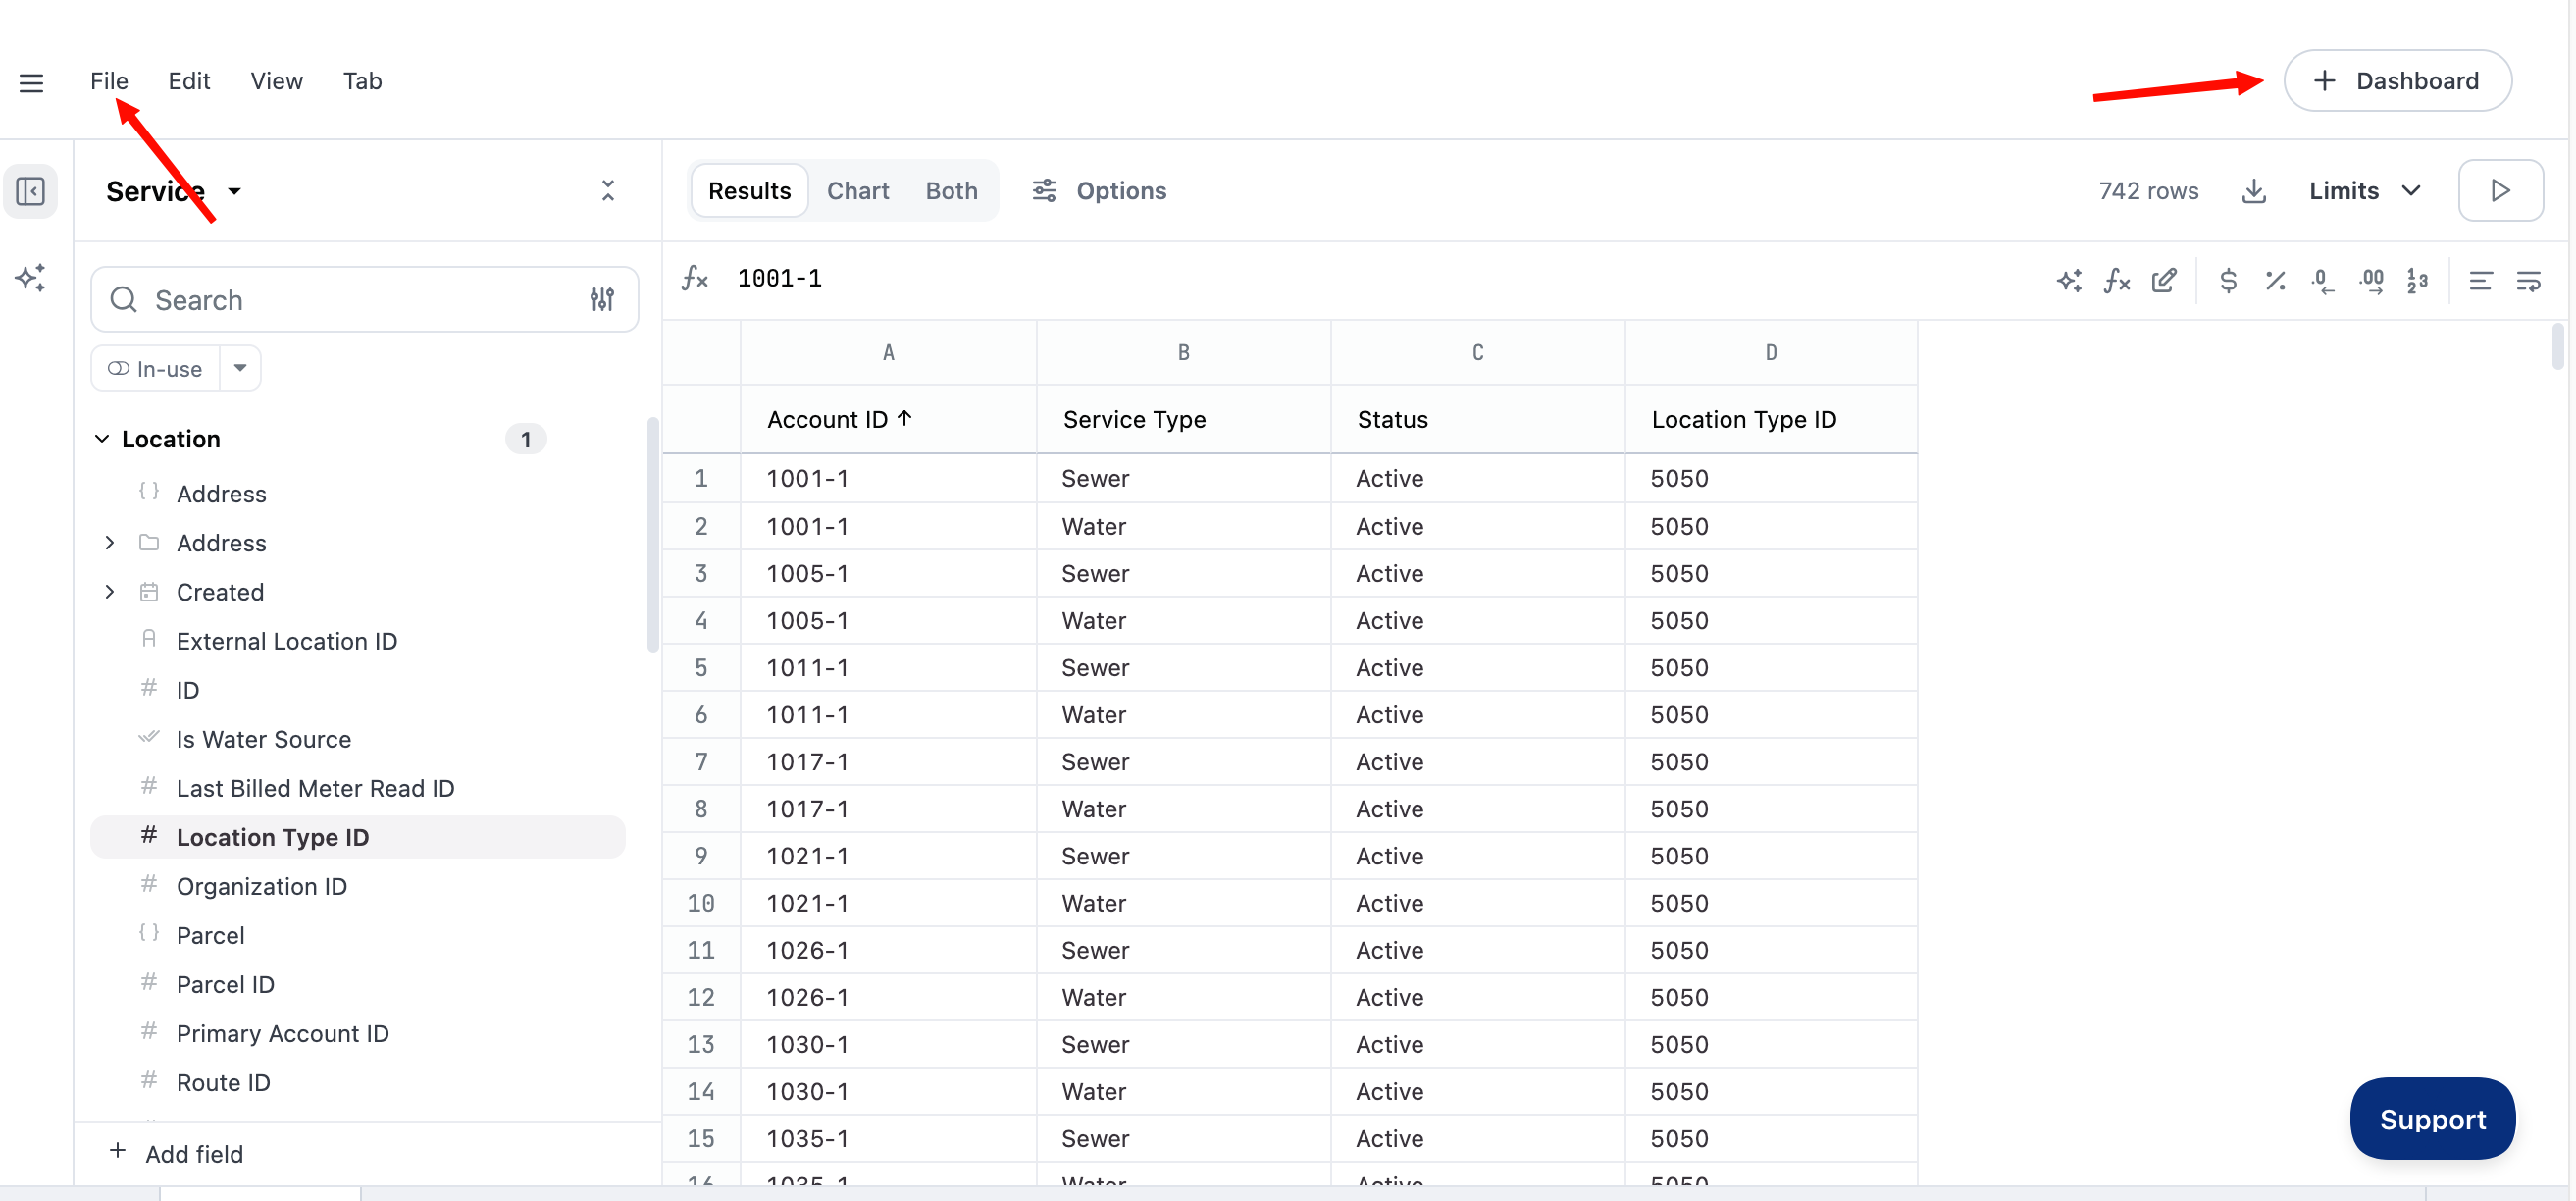
Once you have the report you need, select either +Dashboard to add it to your Dash or File to save the document for access.
The save prompt will appear to let you choose whether to save it for everyone to access (Hub) or just in your personal documents. The document can also be added to favorites.